Wednesday, April 30, 2014

DIY: Captains Storage Bed

The weather this week is supposed to be gorgeous, until the weekend of course why is that? As a Stay at Home Mom, with no kiddos at home, I am totally going to enjoy every second of the sunshine during the week, I’m thinking afternoons reading outside with an Iced Tea or maybe an Iced Coffee, sound perfect. Maybe I’ll do some of my workouts outside instead of in the gym this week. Man-Childs first Baseball game of the season is this week too so how awesome is it going to be that it’s actually gonna be SUNNY! It just feels great to have the possibilities of doing things outside and being warm and dry while doing them. If you live in the Pacific Northwest you know what I mean!

Anywho onto the actual topic of this post today and that’s Man-Childs new bed! He’s been bugging us for well forever really about a new bed. He’s had the same twin bed since he was 4! And it was a great bed, but the problem is that he’s now 13 and already 5’10”! He just wasn’t fitting in that twin bed anymore!


Well the Hubster decided that he was going to build him this new bed! We looked at all kinds of options, I really love the Pottery Barn loft beds but umm they are a little A LOT out of our price range. So we thought about trying to build that the problem is that our house has low ceilings so a loft bed wasn’t going to work. So we scoured Pinterest and did other google searches looking for a bed that would be prefect and that’s going to last at least 4 more years!


We finally found it at ana-white.com. Her plans are so perfect and they are FREE! Which is always a bonus. Seriously if you like to do woodworking check out her site she has great plans for so many things I think I want the Hubster to build me the Farm House Table soon!
Ok back to the bed. We decided on the Full Size Captains Storage bed. I love how it has extra storage on the sides and that he can’t push a bunch of junk under his bed! It took the Hubster and Man-Child about 5 days to complete this bed and that’s including staining it. And it only cost about $150! We chose a grey stain to just have something a little different. I thought it would go well with his favorite colors Blue and Orange.


We still need to do a head board look for that post soon and we are still looking for bins to put in the storage areas. I’ll post an update when we complete it all.

We followed her plans and the only changes we made were to make Dado cuts to make the joints stronger. You can get the full plans HERE


Enjoy

Monday, April 28, 2014

Healthy Meals: Cauliflower Fried Rice


Yesterday was the Hubsters’ Birthday and man oh man did we indulge! I’m talking a big breakfast, lunch, dinner and a  super rick Chocolate Peanut Butter Cup Cheesecake that was so RICH to top it all off! It was so good but really OVER the calorie goal for the day that I didn’t even think about keeping track. Every now and then you have to treat yourself to a special meal or two! But since we did over indulge a little, I’m feeling like we need to have a few healthy meals this week.


My post on Quinoa Fried Rice is one of my most Pinned Pins on Pinterest. So when I tried Cauliflower Rice a few months ago I figured I could make it into a Fried Rice. It seems like the perfect Healthy Meal to have this week.


I didn’t add any meat this time, but you could totally add in some diced chicken or ham or whatever you happen to have in the fridge.


Ingredients:

1 medium head of Cauliflower
1 Onion, diced
1 clove Garlic, minced
1 Carrot, shredded
1 cup Peas
2 Eggs
1 TBSP Olive Oil
4 TBSP Soy Sauce

Directions:

 In a food processor shred all the Cauliflower. In a large skillet add the oil and heat over medium heat. Add in the onions and garlic cook for a few minutes until the onions are translucent. Stir in the Cauliflower, Carrots and Peas add in the Soy Sauce, stir to combine. Cook until Cauliflower is no longer crunchy. Make a well in the middle of the Cauliflower and pour in the Eggs, stirring to cook.  Let cook a few more minutes, remove from heat and it is ready to serve.


Enjoy

Friday, April 25, 2014

Raspberry Lemonade Wine Slushie


This past winter I went to one of those craft and gift shows, one of the things I saw and really thought about getting was a wine slushie mix. But the price was a little high in my opinion! Talking with my friends that were with me, I mentioned that I could probably figure out a way to make these. I mean it was just adding a flavor packet to a bottle of wine and freezing it. Shouldn’t be that hard right?


Jump forward a few months and I finally got around to trying this out. AND IT’S AWESOME! You could really try so many different flavors and just changing the wine will change it up, get creative!


Ingredients:

1 Bottle of Wine (I used a Riesling)
1 Raspberry Lemonade Crystal Light Drink Mix
1 cup Water

Directions:

In a large mixing bowl combine the wine, drink mix and water, stir until the drink mix is dissolved. Then pour into a zip top bag and place into the freezer for at least 6 hours or until frozen. When you are ready to serve, take the bag out of the freezer and scoop the frozen wine mixture into glasses and serve.


Wednesday, April 23, 2014

DIY Wine Bottle Stoppers


Mother’s Day is coming, can you believe that it’s only a little over 2 weeks away? I have the unique situation of having 3 Moms, and a Mother in Law so Mother’s Day can get a little crazy, plus I’m a Mom too so it’s also my day right?!


I’m always looking for cool little gifts and any time I can give a homemade gift I chose that option. Remember as a kid you would make something for your Mom at school or maybe in Sunday school? I cherish those gifts from my Son and I know my Mom’s still have several of the gifts I made them growing up. I think its fun to give them something that I make now.


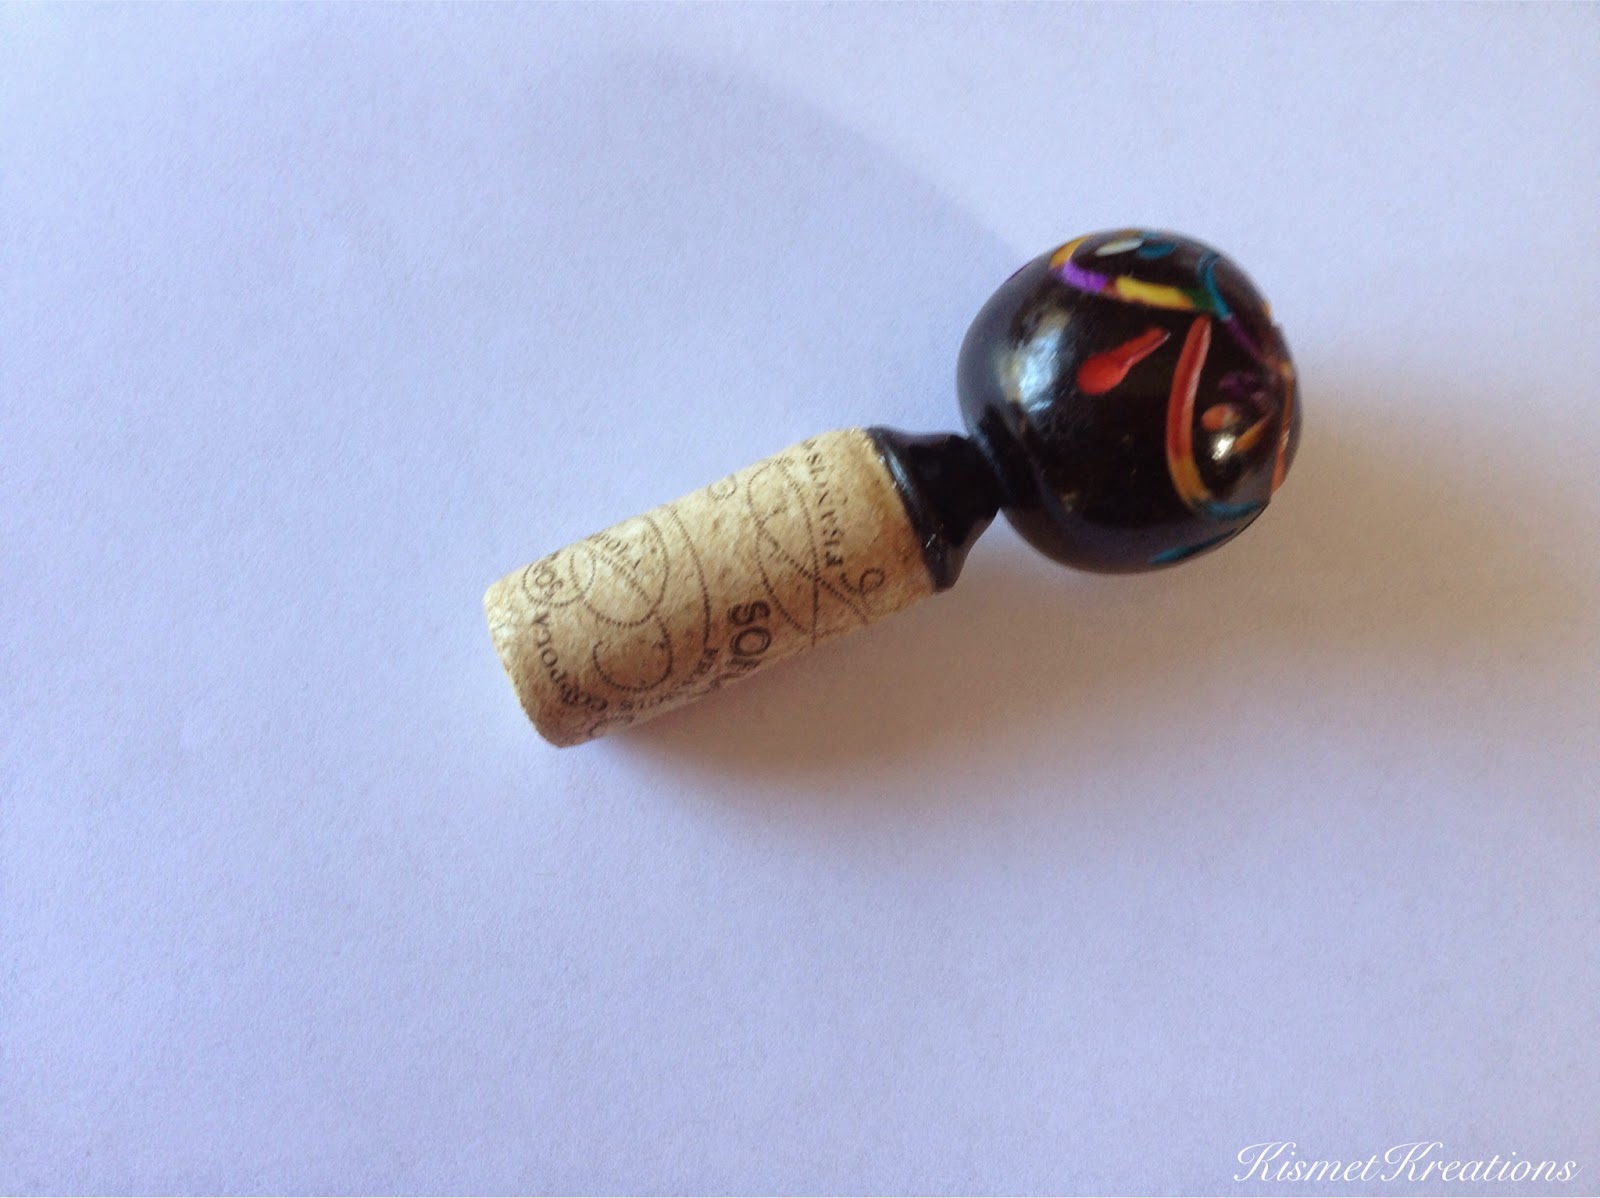
I’d seen Wine Stoppers made with corks and a drawer pull, and I thought I could totally do that! The hardest part of this project was deciding which drawer pull to use. I went to Hobby Lobby and looked through all of the ones they had. They had great ones that are super sparkly and then they have really simple ones too. I went somewhere in between.
For a great gift presentation pair the wine stopper with a nice bottle of wine and maybe a couple of new wine glasses.


Materials:

Wine Cork
Drawer Pull
Glue

Instructions:


I used a cork from a previously opened bottle of wine. Which works great for this project, because you’ve already made a hole in the cork from the corkscrew. Take some glue (I used E6000) and spread a thin coat around the screw part of the drawer pull. Screw it into the cork. I also placed a small amount of glue on the underside of the drawer pull. Screw it in until the bottom of the drawer pull is flush with the cork. Let dry and then it’s ready to keep that opened bottle of wine fresh, and looking pretty.

Monday, April 21, 2014

Family Dinners: Burger Cook off


We love a good burger, and Man-Child makes a killer burger and so does the Hubster so we decided to have a burger cook off the other day. I think a little healthy competition every now and then is good for you.

Of course it's more fun if you have something to win, and the prize this time was worth winning, the loser had to do the winners chores on a day of the winners choosing. 

It was really hard to decide who won, and maybe we should've done a blind tasting, BUT I stand by my decision that Man-Child won! I think what won it for him was the mayo and the grilled bun! But the Hubsters was really good too and I would eat either of them again. I think we need to continue this competition! 

Give the burgers a try and let us know whose you like the best!
We decided to make sliders since we were going to have to eat 2 burgers each.

Man-Child's Texas Heat Burger

Hamburger
Salt
Pepper
Garlic Powder
Onion Powder
Tapatio

Toppings
Bacon
Colby Jack Cheese
Jalapeños 
Grilled Buns brushed with garlic butter
Spicy BBQ Mayo

The Hubsters BBQ Burger

Hamburger
Salt 
Pepper
Onion Powder
Garlic Powder
Worcestershire Sauce
A1 Steak Sauce

Toppings
BBQ sauce
Bacon
White American Cheese


To make the burgers combine all the ingredients and form into patties. Place onto a preheated grill and cook until no longer pink in the middle. 
For the Texas Heat Burger Spicy BBQ Mayo: in a small bowl combine 2 TBSP BBQ sauce 3 TBSP Mayonnaise and a few dashes  of tapatio. 

Enjoy

Friday, April 18, 2014

Burlap Cross


I saw these burlap crosses on Pinterest and I knew I was going to have to make myself one. The link was to an Etsy shop so there isn't a tutorial. But I figured from the picture I could probably figure out how to make it, or at least something close to it.

The tricky part for me was figuring out how to get a cross in the shape and size I wanted. I found a wooden one at Hobby Lobby and decided to use that for my pattern. I traced it and then cut my fabric to match.


The burlap fabric is a kind that has a backing on it so it's a little sturdier. Then I decided for the middle print I wanted navy chevrons.I cut both fabrics out to be the same size and then used batting between the burlap and chevron. Stitch the chevron fabric on top the burlap, this is a little tricky. Especially for me since sewing in NOT my strong suit. And as you can see it's not exactly even! I'm not sure if it's my sewing or my cutting that ended up being the issue. I still like it and maybe I'll make another one and try to get it perfect!


To attach it to the door I used a silver wire that I had and I glued it onto the back with E 6000. Then I embellished it with a premade flower clip.

The great thing about this cross is that you can really personalize it to your preference. I went with non traditional Easter colors so I can have it up any time.

Monday, April 14, 2014

Seasonal Eating: Creamed Peas


One more week until Easter, well really less than a week now. As I was trying to decide what to make for this month’s Seasonal Eating I thought it might be nice to do something that you could include for Easter dinner. From the list of vegetables that are in season this month I chose Spring Peas. I think peas are a great vegetable and there are so many different ways to serve them. I almost always buy frozen peas and never canned, I just can’t get over the mushy texture of canned peas. I was excited to see that peas are in season already. However there were none at any of my local grocery stores.


But now I really wanted to make creamed peas. So I decided to go ahead and just use my frozen peas. This would however be great with fresh peas. It is a great side dish, which can easily be doubled or tripled depending on your crowd.


Here’s what you’ll need:

1 cup Peas (fresh or frozen)
1 cup Water
1 tsp Salt
1 can Evaporated Milk
1 TBSP Butter
1 TBSP Flour
Salt and Pepper to taste


Here’s how you make it:

In a sauce pan combine the peas and water and salt, bring to a boil, let boil for about 2 minutes. Drain. In the same sauce pan add the butter and let it melt, then add the peas back in. Sprinkle on the flour and stir until combined. Add in the Milk and continue to stir. The sauce will thicken in just a few minutes. Add salt and pepper and serve.


Enjoy

Friday, April 11, 2014

Healthy Desserts: Chocolate Covered Bananas


Our Spring Break is over! I’m not sure if I’m excited about that or sad, maybe a little of both! It’ll be nice to have the house to myself again during the day, but sometimes, it’s just sooooo quiet! I mean sometimes that’s a good thing right? BUT, sometimes, you know I start talking to myself, well really the dogs, but ya know they don’t talk back, and I’m pretty sure if people heard me I’d be committed!


Which in a weird way brings me to today’s post. Chocolate covered Bananas! In my freshman psychology class our professor told us that a banana a day keeps the therapist away! Bananas have tryptophan, an essential amino acid that gets converted into serotonin (the feel good brain chemical). How much it helps or how much banana you have to eat I’m not sure however it’s a great excuse to eat these Chocolate Covered Bananas anyway!


Here’s what you’ll need:

Bananas
1 cup Chocolate chips (the darker the better for you)
Toothpicks


Here’s how you make it:

Peel and cut Bananas in half. Stick a skewer into the center of the banana. 
Meanwhile melt the chocolate either in the microwave at 30 second increments or over a double boiler. Dip the  Bananas in the melted chocolate, and set them onto a wax paper lined cookie sheet. Store in the freezer. Serve frozen!


Enjoy

Wednesday, April 9, 2014

Easter Eggs


I wanted to decorate our Mantle for Easter.This mantle decorating thing isn't as easy as I thought it would be. I'm always looking for new ways to decorate it and things to add to it. For Easter I have 3 great Longaberger Easter Baskets that I’ve had for years and I knew they would look great up there. But I wanted something else on the mantle. I decided to decorate a few Styrofoam eggs.


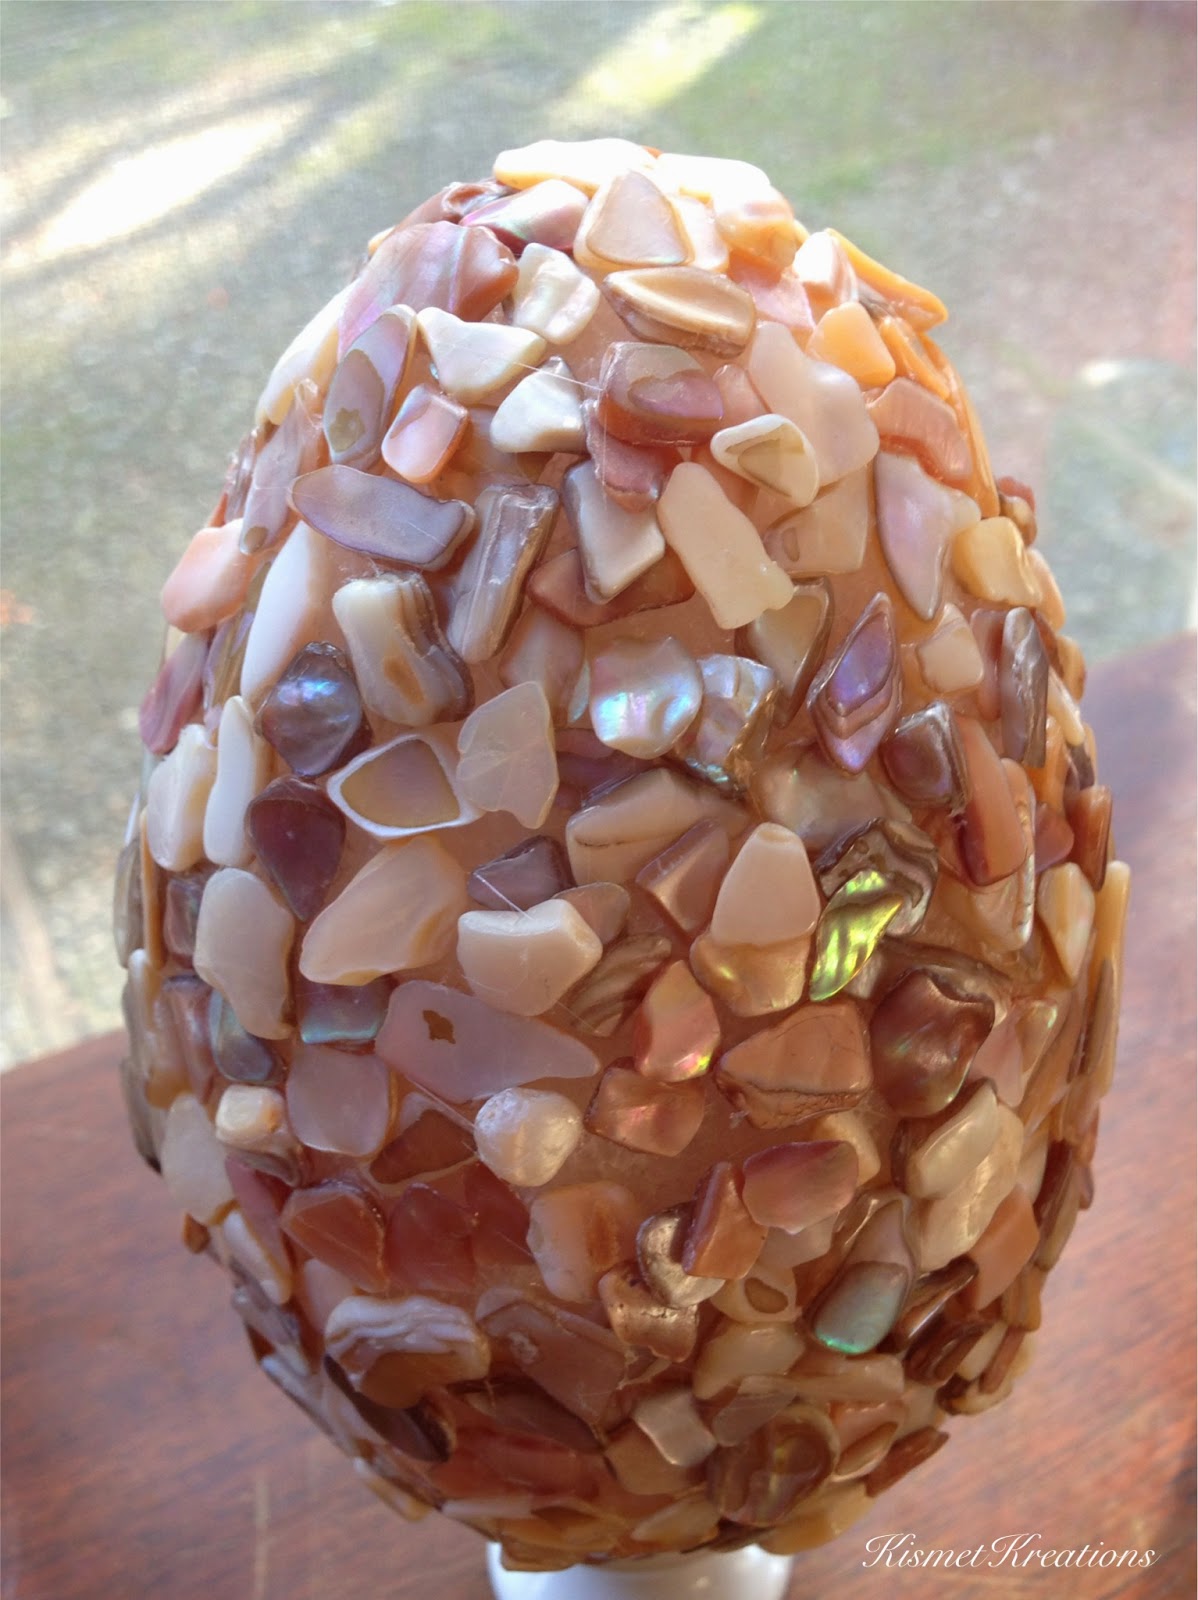
I did some with glitter and then I decided to do one large egg with shells.


Here’s how I did it.


For the glitter eggs, I simply coated the eggs with Elmer’s glue, then sprinkled the glitter over the eggs. Making sure to completely coat the eggs with the glitter, adding more glue and glitter as necessary.


For the shell egg, I tried using the Elmer’s glue but the shells just kept sliding off. I thought about trying hot glue but I was worried that the glue would dry before I could get many shells on and also that it might melt some of the Styrofoam. I ended up using E-6000, if you haven’t used this glue before it’s a great craft glue. I worked in sections on the egg doing one part at a time, then letting it dry. It’s kind of like putting a puzzle together. All in all I’m pretty happy with how they all turned out. I’m not sure how the glitter eggs will hold up in the long run, but they look great for this Easter.


Enjoy

Monday, April 7, 2014

Ham and Cheese Rolls


One of the most frustrating things I’ve found with Pinterest is when you see something you like and then there is no link it’s just a picture! ARGH! That happened to me the other day with this picture of Ham and Cheese Rolls, it looks so good but there was no link just a picture collage.

I did what you do in those situations and I made up my own recipe! I mean what else was I supposed to do? I had to try these rolls right? And honestly they looked pretty easy! And they are super easy and super good! Really if you like ham and cheese you should try this, don’t like ham? Try it with any other type of meat, don’t eat meat? Try it with just cheese, the options are endless and I’m sure I will be trying more recipes with this.


Now let me talk just a minute about the dough recipe I used I found it of course on Pinterest and it’s probably the easiest quickest yummiest dough I’ve ever worked with! It’s called 30 Minute Rolls, and you can use it for so much more than just dinner rolls. But those are good too. Now it is a BIG batch, I made 2 dozen regular dinner rolls and then 2 dozen Ham and Cheese Rolls. So if you aren’t up for that much baking you can freeze the dough or halve or the recipe. You can get the recipe for it at moneysavingmom.com .


Here’s what you’ll need:

(For 1dz rolls)
¼ 30 minute Roll Recipe (follow all the steps until it gets to forming the rolls)
12 slices sliced Ham (I used black forest)
10 slices Swiss Cheese


Here’s how you make it:

After making the Dough roll it out into a large rectangle. Place the ham slices so that it covers the center of the dough leaving about ½ inch of room around the edges. Top the Ham with the Swiss Cheese slices. Roll the dough towards you, like you would to make cinnamon rolls. Once the dough is rolled up slice it into 12 equal pieces. Place into a greased 9x13 baking dish. Bake in a preheated 425 degree oven for 20 minutes or until the rolls are golden brown. Serve warm. Refrigerate any remaining rolls.

Enjoy

Friday, April 4, 2014

Lemon Mousse

Hippity Hoppity Easter’s on its way… 


Can you believe it’s already April, I think I’ve said that every month this year but really it’s just all going by so fast. Sometimes I think we spend so much time wishing for something else to come, babies to take their first steps, say the first words, toddlers to grow out of whatever terrible phase they may be in, our little kids to be more grown up et cetera et cetera, that we miss all the steps along the way! I know now that as we are seemingly getting closer and closer to when Man-Child will no longer be at home (yes it’s still 4+ years away) I wish we had more time. I wish we could slow it all down just a little. As we get ready to celebrate Easter, I’ll miss not having an Easter Egg Hunt and the excitement that used to come with that. It isn’t the reason we celebrate Easter and sometimes it’s nice to NOT have to worry about all that too but it is just one more sign he’s growing up. Oh and for sure we will still be dying Easter Eggs (something’s you never outgrow)


And I know I just wrote that whole paragraph that has almost nothing to do with today’s post, but this Mama is getting a little sentimental lately!


If you are looking for a new dessert I think this Lemon Mousse would be a great addition to your Easter Dinner Menu. It is simple, light and so delish! Is there a fruit that says spring more than Lemons? Not to me! Lemon Mousse is a refreshing treat. I used my recipe for Lemon Curd, but you could use store bought. You can serve it on its own, or maybe as a pie, hmm that sounds good…


Here’s what you’ll need:

Lemon Curd (1 Jar or one recipe homemade Lemon Curd)
Cool Whip

Here’s how you make it:

In a mixer combine the Curd and the Cool Whip, whip until combined. Chill until ready to serve, spoon into individual dishes.


Enjoy