Friday, June 28, 2013

Resolution Update: Rum Punch


I am so happy with the fact that I am still working on my New Year’s Resolutions 6 months into the year. Usually by now I’ve totally given up on them!


I am still working on my Organization and I still need to work on my Kitchen and Master Bath. With the end of the school year craziness I didn’t manage to complete either of those tasks. I have thought about them a lot, and I keep wondering if I should throw out stuff from my Kitchen or just reorganize it. I mean some of the stuff I have I’ve rarely used but well you never know I might need it again! I know it’s the stuff the T.V show Hoarders is based on.

Man-Child and I have had a couple of Movie Dates and we are planning some cool things for the summer! He is joining me during the week now at the YMCA so we get to work out together which is great!

I have been working out so hard at the Y! I am really proud of my dedication! I’ve been going 5 days a week and at my last check in appointment I hadn’t lost any weight but I had lost .5% body fat, which isn’t as much as I want but it’s still a loss so I will take it! I go back in for my 2nd check in next week and I’m excited to see if any progress has been made! My nutrition hasn’t been as great as I want, but it’s getting there. It is a daily struggle sometimes to make the decision to eat something healthy instead of something easy/fattening!

So I know this drink isn’t really healthy probably not at all. I’m sure you could healthify if you wanted to but I was trying to recreate a drink I had on my Honey Moon. If you read Wednesday’s post(HERE) you saw that we celebrated our 14th Anniversary this week. And even though the Hubster isn’t home right now I wanted to bring back a little of the memories from that time! We went to Mexico for our Honey Moon and while we were there we went on this little day cruise. It was so much fun, we snorkeled, fished, swam in the ocean relaxed in the sun, and had a few drinks. I had Rum Punch and it was soooo YUMMY! I thought it would be fun to make it. This recipe is pretty close to what I had there. Oh and tip to the wise, order your drinks without ice when you are in Mexico! ;)


Here’s what you’ll need:


1 cup grenadine syrup (I didn't have any and the store was out so I used the cherry juice)

2 1/2 cups White Rum

1/2 cup Coconut Rum

2 cups pineapple juice

2 cups orange juice

Orange slices (I couldn't find a good orange to save my life)

Maraschino cherries

Pineapple wedges


Here’s how you make it:

Combine the different Rum’s with the Juice, stir. Refrigerate for at least an hour. Serve over ice with an orange slice, pineapple wedge and maraschino cherry. If you end up with some left just put it in a mason jar or other container and refrigerate. It should keep for a few days! 

ENJOY!

Wednesday, June 26, 2013

Anniversary Signs

1999 Our Wedding (yes we are Jumping on a trampoline!)
2012 At the most recent Military Ball
 My Anniversary is today; well I guess I should say “OUR” Anniversary is today!  The Hubster and I have been married for 14 years! Crazy right? Well not really crazy, but I think it’s awesome. Not that it’s always easy peasy but I like to think of Marriage as a work in progress! It’s funny though we’ve been really lucky and this is actually one of the few Anniversaries we’ve spent apart. Usually when the Hubster is deployed he takes R&R during our Anniversary and Man-Childs birthday, which are a week apart! Well a YEAR and a week apart! Just wanna clarify that in case anyone is doing the math ;) 


A few months ago on a blog I follow The Happy Housewife; she had a post about these great signs made with your name and Bible verses that start with the first letter of each letter of your name. Phew that was a mouthful, I hope you got all that cause I wrote it and even I’m not sure I know what I just wrote?! Anyways,  I knew right away I was going to make these for everyone for their Anniversary’s this year., using everyone's Last Names. And I did make them however all the anniversaries have passed and I have yet to mail them! OOPS! Oh well, better late than never right. I totally should save them for Christmas or something but you know what would happen if I did that? I would lose them! Happens every time!

For these signs go ahead and check out thehappyhousewife.com and see her great tutorial, and a list of Bible verses.

For my signs, I used the Bible verses she had and then had to search for a few more for repeating lettings in our last name. To do this I just Googled “Bible verses that start with the letter a” (as an example) Then went through and chose the verse I liked the best. I think this makes a great gift. I know I love my sign and I hope the ones I made signs for love them too!


ENJOY!

Monday, June 24, 2013

Filipino Chicken


I haven’t felt like cooking at all lately. I’m not sure why? I mean I LOVE to cook and I love trying out new recipes. Hello that’s why I started blogging, so I would have a place to record everything I was trying. Thank you Pinterest! But lately I just haven’t been feeling it?! So I’ve either been doing super simple recipes or sandwiches. I know so not being a stellar Mom these last few weeks. But I may be redeeming myself with this recipe. It’s actually an old favorite, that my Sister first made for us a long time ago and I make it fairly often now. She usually uses Chicken Thighs but I like Chicken Breasts better, so that’s what I use. I also double or sometimes triple the vinegar and soy sauce so that I have more sauce left when it's all made.

Here’s what you’ll need:
4 Boneless Skinless Chicken Breasts or 8 Chicken Thighs
1 TBSP Olive Oil
1/3 cup Water
¼ cup White Vinegar
¼ cup Soy Sauce
2 Bay Leaves
1 tsp minced Garlic
¼ tsp Black Pepper
2 TBSP Red Chili Pepper or ¼ cup Toasted Coconut (both are optional)


Here’s how you make it:
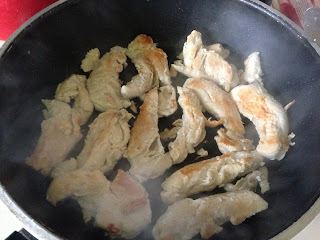
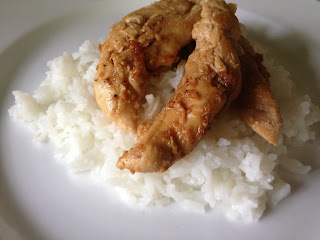
In a large skillet brown the Chicken on both sides in the Olive Oil. Drain off the extra oil. Add Water, Vinegar, Soy Sauce, Bay Leaves, Garlic and Pepper to the skillet. Bring to a boil and reduce heat. Cover and let simmer for 30-35 minutes or until Chicken is tender and no longer pink. Remove Chicken and place onto a platter, keep warm. Bring the remaining liquid in the pan to a boil for 3 to 5 minutes or until reduced to about ½ cup. Remove and discard Bay Leaves. Drizzle sauce over Chicken. Sprinkle with Chili Peppers or Coconut if using.
ENJOY!

Friday, June 21, 2013

Super Easy Root Beer Float Cupcakes


Man-Child LOVES Root Beer! He is always trying a new kind, whenever we see a new brand he has to get it! We’ve even bought a Root Beer mini keg before! For his Birthday a few years ago he decided he wanted a Root Beer Cake! I was like seriously? Honestly it sounded kind of weird to me and maybe a little gross? But I figured what the heck and gave it a try. It was surprisingly good. I thought I would try to improve on it just a little and make Root Beer Float Cupcakes! Plus it's the first day of Summer and Root Beer Floats kinda scream SUMMER to me! The Original cake I made was a bundt cake with a Root Beer glaze drizzled over the top, but I thought frosting would work better on a cupcake and make it more like a Root Beer Float!

Here’s what you’ll need:

CupCakes:

1   yellow or white cake mix

1 (12 oz) can or bottle Root Beer (use the Root Beer you like best)

½ tsp Root Beer Concentrate/Extract

1/4 cup vegetable oil

3 eggs

Frosting:

1 container Cool Whip

1 sm pkg Vanilla Pudding

¾ cup Milk

½ tsp Vanilla

Cherries & Straws for decoration


Here’s how you make it:

Preheat oven to 350 degrees. Place cupcake liners in the cupcake pan. In a medium bowl, stir together the cake mix, root beer, oil and eggs until smooth. Scoop batter into the cupcake pan. Bake for 25-30minutes, until a toothpick inserted comes out clean. Cool cupcakes in pan for a few minutes and then move to a rack to cool completely. Meanwhile in a small bowl combine the pudding and milk, then stir in the Cool Whip and add the Vanilla. Place the Frosting into a zip top bag and snip off the end and frost each cupcake. Add a Cherry to each cupcake. Cut Straws in half and insert them into the cupcakes, to make it look like a Root Beer Float!

For a Different Variation use the Root Beer Glaze

Root Beer Glaze:

1/2 cup confectioners' sugar

3 tablespoons root beer

To make the Root Beer Glaze: combine the confectioners sugar and 3 tablespoons of root beer in a small bowl. Beat until smooth. Poke holes in the cake with a skewer at 2 inch intervals. Pour Root Beer Glaze evenly over cake.
Either Way you make it it's a fun and different treat! Give it a try and let me know what you think!

ENJOY!
Wednesday, June 19, 2013

GIVEAWAY!!


School is out and if you are anything like me you are trying to keep your kids entertained, and at the same time hoping that they won’t lose all the knowledge they gained throughout the school year. I have a great blog to recommend to you for just this topic. It’s called kidsmysteryreviews.com and it’s great, every week there is a new book review and then there are games and riddles and author interviews. I like that kids can go on and read about a book that they might like, and maybe solve a riddle or two. Or play detective. The site is geared towards 3rd-6th grades, but I know Man-Child, who is going into 8th grade, still enjoys checking out the riddles and puzzles.

The Blogger is Sharon Brown (aka S.D Brown) and she is (besides being AWESOME) My Mom! How cool is that right? Did you know she’s actually the one who got me started blogging? Yep she sure is! Anyways, I thought it would be great to let you guys know about her blog and another FUN FACT she is also an Author!

So I thought I should try out my very first GIVEAWAY! That’s right you read it correctly I said GIVEAWAY! What Am I giving away? One copy of my Mom’s book “The Lake Quilt Riddle” How do you enter? Well you just leave a comment on my blog telling me what your favorite book is in the comment section and a winner will be randomly chosen.

The giveaway starts today June 19, 2013 and ends on June 26, 2013 at midnight Pacific Standard Time. The Winner will be announced on June 27, 2013, both on Facebook as well as on here. Don’t follow me on facebook yet? Well here’s your chance click HERE. The Winner will have 48 hours to contact me with their information! As this is the first contest I’m holding and I’m all new to this kind of thing, the contest is only open to United States Residents.
Can't wait to see if you are a winner? Want to purchase a copy now, maybe on your Kindle? Click Here!

GOOD LUCK & ENJOY!

Monday, June 17, 2013

Drop Biscuits Muffin Style


My all time, hands down favorite-ist breakfast in the whole wide world is BISCUITS & GRAVY! I mean what’s not to love, fluffy biscuits, sausage gravy! Emmm… I used to order it out until my Grandma Charlotte told me not to order it at this one restaurant we were at because it may not be so freshL gross right? From then on I was always leery of ordering it in restaurants, if I was with her I would ask if it was ok to order it at the restaurant we happened to be at, if I wasn’t with her I just didn’t chance it, she was in the know on these things. I pretty much never order it out and so I only get it if I make it myself or if I happen to visit one of my parents and I manage to con them into making it for me. On one such occasion my Mom made it for me, but instead of traditional rolled biscuits she made drop biscuits, but not regular drop biscuits she put them into a muffin tin. I thought this was such a fun idea, so I decided to share the recipe/idea with you! Now you can use regular ol’ Bisquick if you want and I do a lot of the times, especially on a busy weekday morning. But if you want super yummy fluffy melt in your mouth biscuits make them from scratch with BUTTER you won’t be sorry!

Here’s what you’ll need:

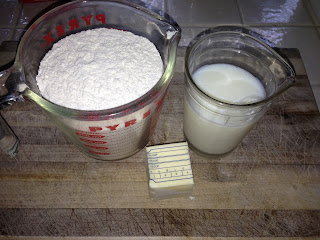
2 cups Self Rising Flour

¼ cup Butter

2/3 cup Buttermilk

Kitchen Tip: No Buttermilk No Problem, add 1 TBSP White Vinegar to 1 cup Milk, stir and use as stated in the recipe.


Here’s how you make it:

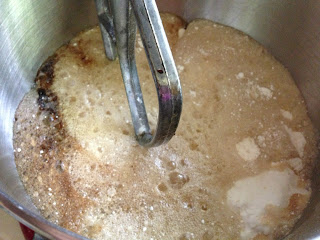
Preheat oven to 450. Spray Muffin tin with cooking spray. Combine Flour and Butter mix together until it resembles small crumbs. Add in the Buttermilk and mix until just combined. Now for these drop biscuits just place a scoop of the dough into each muffin cup. Bake for 8-10 minutes until the top is a light golden brown. Let cool slightly before removing from pans and serve warm. These are great for biscuits and gravy or with a bit of homemade Jam or Jelly!

ENJOY!

Friday, June 14, 2013

Lemon Dump Cake


A few months ago I made a Chocolate Dump Cake, it was a super simple super yummy recipe that people seem to really like. In fact it’s the most viewed recipe on my blog. It gets several views every single day. Which is so awesome! I totally understand too because it’s a super simple super easy dessert to throw together at a moment’s notice. Because it’s so popular I thought I would try to make another “Dump” cake and see if it is as well received. I thought a Lemon Dump Cake would be tasty. However I was worried about it being TOO lemony, so I used Lemon cake but vanilla pudding. I think it’s pretty good, let me know what you think!

Here’s what you’ll need:

1 box Lemon cake mix
1 small package Vanilla pudding mix
1 1/2 cups milk
1 1/2 cups white chocolate chips


Here’s how you make it:

Preheat oven to 350 degrees.
Combine the cake mix, pudding, and milk in a bowl and mix until combined. Spread into a greased 9x13 baking dish. Top with the chocolate chips and bake for 30 minute or until the edges pull away from the pan.

Let it cool and serve by itself or with a few raspberries or maybe some whipped cream or *gasp* BOTH?? YUM

ENJOY!

Wednesday, June 12, 2013

Picture Frame Re-Do


If you happen to follow me on facebook you might remember a post I made about trying to decide if I wanted to paint my brown wooden picture frames different colors or black. I’ve been really indecisive about this.

We actually have been in this house for almost 2 years and we don’t have any family pictures up because I can’t decide what I want. At first we were going to just get all new frames. Then I was like that’s crazy right let’s just paint them black! Then I was like wait what if they were all different colors? I’m sure the Hubster was pulling his hair out by this time, and meanwhile our walls are empty, plain and boring off white. This is what ultimately led to my decision to paint them wait for it... multiple colors!

Part of being an Army Family is that we move, and we move A LOT! And every house is always painted off white or white inside. And while some places will let you paint I always figure it’s silly to do it when we are going to be moving in a year or two. Especially when you figure in that you are going to have to paint it back to the original color before you leave. The expense and time needed for that just isn’t worth it to me. Anyways, that’s why I decided that colored frames would be great!

I choose to spray paint them 4 different colors, Orange, Blue, Red, and Green. I chose the spray paint that had primer already added so I wouldn't need to do numerous coats. Except for the Green they didn't have any in stock in the color I wanted so I just went with regular Spray Paint. It took 3 coats for the Red and Blue and 5 coats for the Green and Orange. I'm not sure why the orange needed so many but it did. I plan to add in black frames as we add photos to the collection. Partly because 4 is an even number and I have this thing about decorating stuff needing to be odd numbers. I know it’s weird I just think it’s more pleasing to the eye. Maybe I’m just a little neurotic who knows!

I had 18 frames to paint which meant that I had to paint more of one color. And that my friends was an easy choice, in our house the color Red wins out every time!

I also have to mention that now that they are all painted and the photos put back in them I'm wondering if I should have done something a little less vibrant and also a little less primary colorish. I don't know! See how indecicive I am! Maybe once I get them up on the walls! 

Here are the Frames Before

During

After
I know they should be on the walls but I am still trying to configure the layout! I will post an update when I do!

And yes it is kind of an homage to Man-Child, the joys of having an Only! 

I think that we will probably buy future frames in black and that way we will have the splashes of color intermingled throughout. I really do love all the different colors I think it livens things up a little!

ENJOY!