I was planning on making some more Halloween Costumes for my Niece and Nephew this year but they both wanted to be things that were honestly easier and cheaper to buy than make! My niece is going to be Belle from Beauty and the Beast, and my nephew is some Soldier Skeleton thing? Man-Child wants to be Uncle Si from Duck Dynasty, and that's a simple outfit all we had to do was buy the beard! So no costume creating for me this year! I thought I would just let you revisit the costumes from last year! And I'm hoping next year I will get to create some cool costumes!
Showing posts with label Halloween. Show all posts
Showing posts with label Halloween. Show all posts
Monday, October 21, 2013


Wednesday, October 31, 2012
Fisher House: Witch Hat Cookies
It’s our turn at the Fisher House again! What a great opportunity
this month our day to provide a meal is on Halloween! Now I usually bake cookies
or something else for the families. BUT I couldn’t resist making these cute
Witch Hat Cookies! I hope these cookies bring a smile to the families.

Here’s what you’ll need:
Cookies (I used Keeblers Fudge Stripe Cookies)
1 bag of Hershey’s Kisses
Powdered Sugar Frosting
Food Coloring
Here’s how you make it:
Powdered Sugar Frosting:
2 Cups Powdered Sugar
1 Stick Softened Butter
2TBSP Milk
Food Coloring
Combine Sugar and Butter in a mixer and mix until combined.
Add the milk a little at a time you want this to be a “thicker” frosting. Add a few drops of food coloring
to the frosting and mix.I put my frosting into a ziploc baggie and snip off the tip to apply the frosting.


Take Cookies and put a ribbon of frosting around the center.
Unwrap the Kisses and place them on the frosting pressing down lightly to smush
the frosting out a little bit. That’s it that’s all you do! Aren’t they cute!
ENJOY!
Friday, October 12, 2012
Trick or Treat Bags
When I was a little girl I had this great trick or treat bag, it had my name stitched onto it and everything. I think it was a cute litte girl witch on the front. I love that bag! I love that all these years later I still remember that bag, I also remember all of my homemade costumes. They were so great. I was a princess one year, a belly dancer another and even a red mouse once, that one was great it was pajamas after halloween was over! So back to the bag, I love the idea of my kids having homemade things and I hope they will have the same fond memories that I do when they grow up! So my son had made a trick or treat bag a few years ago. And this year I thought I would make my neice and nephews bags too!
Here's what you'll need:
Black Bag
Puffy Paint
Cardboard


Here's how you make it:
Place a piece of cardboard inside the bag to prevent the paint from going through the bag to the other side. Then decorate the bags! It's a fun project for the kids to do. If my niece and nephew lived closer I would have had them do the bags. But instead I am did the bags. You can use stencils or just freehand the designs whatever look you like the best! Be sure to write the names on the bags so there isn't any confusion on whose candy is whose!;)
Enjoy
Here's what you'll need:
Black Bag
Puffy Paint
Cardboard


Here's how you make it:
Place a piece of cardboard inside the bag to prevent the paint from going through the bag to the other side. Then decorate the bags! It's a fun project for the kids to do. If my niece and nephew lived closer I would have had them do the bags. But instead I am did the bags. You can use stencils or just freehand the designs whatever look you like the best! Be sure to write the names on the bags so there isn't any confusion on whose candy is whose!;)
Enjoy
Wednesday, October 10, 2012
Painted Mason Jars
I love all the different ways to decorate a Mason Jar! Besides canning, I've used them forever to put fresh flowers in. I think there is something quite beautiful in the simplicity of mason jars. This was my first attempt at painting the jars. I think they turned out ok. I actually think I like them plain with out the letters on them the best. Again I think it's the simplicity that I'm drawn to. I did put some silver ribbon around the tops to give them a little punch! I may have to paint some more jars in different colors for different holidays or events. I think maybe Red White and Blue ones are definitely in my future!
Here's what you'll need:

Mason Jars ( I used quart size)
Acrylic Paint
Water


Here's how you make it:
Pour Paint into jars, add a little water ( just a little you want the paint to be thinned out but not watery) Swirl the paint around in the jar coating all sides of it, add more paint if necessary.When I was first trying this I did try to paint the paint on with a brush but let me tell you that wasn't workin' for me, it was streaky and not at all what I was going for. So try the swirly painting method! Let dry, add more paint to get the level of coverage that you want. Now here you can add Letters to the outside with paint or stickers, or you can add faces or designs. Like I said I really like the plain painted jars myself.
Here's what you'll need:

Mason Jars ( I used quart size)
Acrylic Paint
Water

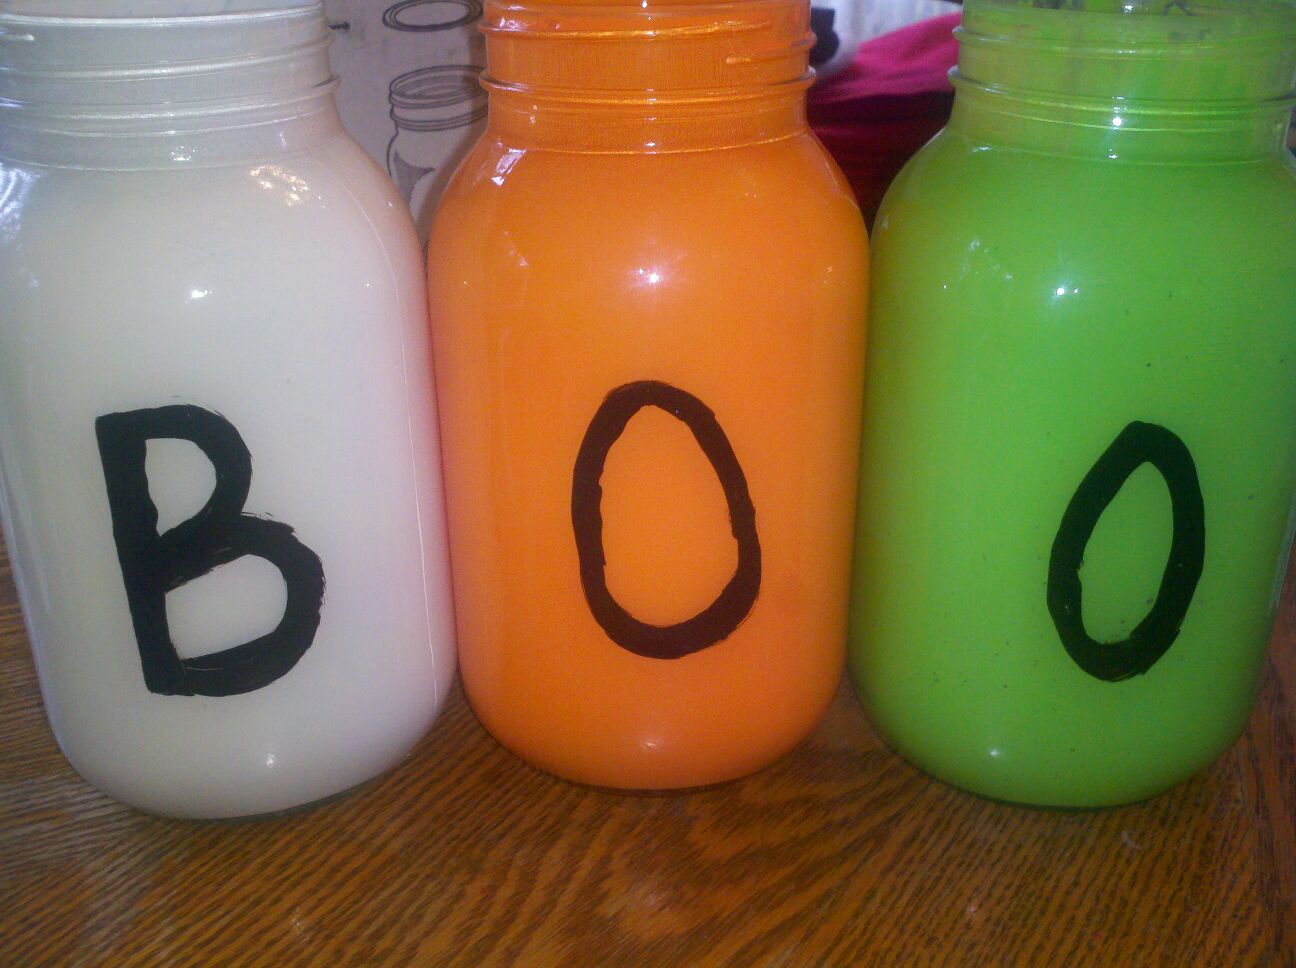

Here's how you make it:
Pour Paint into jars, add a little water ( just a little you want the paint to be thinned out but not watery) Swirl the paint around in the jar coating all sides of it, add more paint if necessary.When I was first trying this I did try to paint the paint on with a brush but let me tell you that wasn't workin' for me, it was streaky and not at all what I was going for. So try the swirly painting method! Let dry, add more paint to get the level of coverage that you want. Now here you can add Letters to the outside with paint or stickers, or you can add faces or designs. Like I said I really like the plain painted jars myself.
Friday, October 5, 2012
Painted Pumpkins

I love all the painted pumpkins I’ve been seeing around. And I love the small little pumpkins. I
decided to paint some small pumpkins for my table center piece! I thought that
painting them white and then using black, orange, and glow in the dark puff paint
would be a great way to decorate them and give them a little “pop”! I know the glow in the dark paint won't be too visable but well it's Halloween and glow in the dark paint just feels right! I’m
planning on getting all my decorating done this week too. Venturing into the
attic and hoping they don’t have to send out a search and rescue team to find
me!

Here’s what you’ll need:
Mini Pumpkins (I used 5 I like odd numbers in my décor)
White Acrylic Paint (I used Light Ivory)
Puffy Paints (orange, black& glow in the dark)
Paint Brushes
Paper to cover on the table

I painted 2 coats of the white paint

Here’s how you make it:
I cleaned the dirt and gunk off the pumpkins with some
vinegar. Then I painted the pumpkins, I didn’t paint all the way to the bottom.
Let that coat dry and then cover it again. When the last coat has dried apply
your puff paints in whatever design you like! I decided that I like the black and white ones the best, I think the orange would be ok IF it was maybe not such a bright orange? I also think an olive green would be a great color to incorporate!
ENJOY!
Subscribe to:
Posts (Atom)